Be warned this is a silly, self indulgent blog post, but i'm compelled to share this with you.
It stems from a realisation that I have had so many ideas that haven't really gone anywhere i've successfully amassed a list of half baked plans and projects. We've all been there - whether its a plan to write your auto-biography or take over the world. Okay they're extreme examples but you know a mish mash of ideas for projects that never quite make it off the page or out of our heads.
Now i feel its time to fess up about these and who knows perhaps it will give you a laugh.
This is my list below, what's yours?
1. Much a Zine About Nothing - a free zine/fanzine about precisely what it says on the tin - nowt really, just stuff.
2. The Caretaker - this is a children's story, of which i have approx written 1/2 of, at a push. I won't giveaway the storyline in case one fateful day I actually finish it. Unlikely given its been in it's half complete state now for 4 years!
3. Make cushion covers from a vintage fabric - I've had the fabric for over 18 months. Need I say more.
4. Do a painting - This would seem strange being I like to call myself an artist and all, but I've not painted in a hell of a long time & very much want to get back into it. I even asked for a set of water colour paints for Christmas just gone. The box is yet to be opened. Think i'm scared to try its been that long.
5. Finish illustrations for Dizzy Dandy - This is a wonderful and very nearly complete Children's story written by a friend. I would just like to point out (in case my friend Andy who wrote this story is reading) that this list is not in order of priority. Andy I promise I will finish this!!
6. Do some street art - The basic premise of this little idea is to produce some sticker art and plaster them all over the city - yeah right. Needless to say I doubt it will happen anytime soon.
7. Make 2 A line skirts - In my possession i've two lots of gorgeous fabric and a pattern, but as yet no skirts. HOWEVER i have cut out the pattern - now thats a start.
8. Baby bunting - I had planned to make some bunting for a friend's nursery as a present for the birth of their baby boy. That baby is now 4. Too late, i have to wait for another baby.
Right now its your turn to confess....
Oh I just remembered i missed one off the originally published post, so this is a little update -
9. Documenting John Snow's ties - A blog dedicated to the ties of John Snow and maybe the odd sock. Simply a daily photo record to show what tie he is wearing today.
Welcome to the my blog. My name is Lucy Farfort i'm a freelance illustrator & designer maker. This is where you can find out what i've been up to of late, read my attempts at a decent post & the rantings of a visual addict. Hope you like it. You can contact me to say 'hi' by email on lucy@lucyshappyplace.com
If you would like to take a look at my work (& i would very much like you to) please visit my site: lucyshappyplace.com
If you would like to take a look at my work (& i would very much like you to) please visit my site: lucyshappyplace.com
Tuesday, 28 February 2012
Friday, 24 February 2012
Zzzzzzzzzzzz
Yawn and stretch....
Dragging my carcass out from under the warm duvet this week has been particularly difficult this week. Its possibly due to a cold that i can't shift or perhaps working too hard - but more likely a love of my bed.
These days bedtime is definitely my fave time of day. So as you've already guessed no doubt, this Folksy Friday is dedicated to all things sleep inspired.


Luscious lavendar sleep pillows by Suzie & Me & super cute sleep mask from Hotch Potch
Beautiful 'Bedtime Story' print by Victoria Brook & cosy hot-water bottle case by Selvage
Cloud sweet dreamer pack from Rustic Kitsch and dreamy art from Claire Barone
Thats all for this week. Hope you have a happy Friday and an equally happy weekend.
Is it bedtime yet?
Dragging my carcass out from under the warm duvet this week has been particularly difficult this week. Its possibly due to a cold that i can't shift or perhaps working too hard - but more likely a love of my bed.
These days bedtime is definitely my fave time of day. So as you've already guessed no doubt, this Folksy Friday is dedicated to all things sleep inspired.


Luscious lavendar sleep pillows by Suzie & Me & super cute sleep mask from Hotch Potch
Beautiful 'Bedtime Story' print by Victoria Brook & cosy hot-water bottle case by Selvage
Cloud sweet dreamer pack from Rustic Kitsch and dreamy art from Claire Barone
Thats all for this week. Hope you have a happy Friday and an equally happy weekend.
Is it bedtime yet?
Monday, 20 February 2012
More, more, Polyvore
Being that I’m about 5 years behind everyone else technology wise I've only just discovered what Polyvore is. I keep seeing the word mentioned around and about the place on tinterweb but didn’t actually know what it was. Yesterday however I decided to take a gander and now I think I may be hooked. What a great idea!
It reminds me of being little and intently pawing through the glossy pages of my mum's newly received mail order catalogue marking any items along the way which took my fancy, with the intention of purchasing these with my imaginary unlimited piles of cash.
It reminds me of being little and intently pawing through the glossy pages of my mum's newly received mail order catalogue marking any items along the way which took my fancy, with the intention of purchasing these with my imaginary unlimited piles of cash.
Well once in Polyvore i couldn't leave without creating a collection and my first one is modeled around this handsome devil below. A naughty impulsive purchase bought from Lucie Ellen's shop on Etsy that i could not resist. Sorry purse!

I tried to import the image from Etsy but unfortunately it wouldn't let me. Perhaps I haven't quite worked out how to use Polyvore properly yet. However considering my luck with technology stuff, its a miracle I was able to do this at all. Heres the set, the first of many i'm sure. Hope you like it. Oh and if you've created any Polyvore sets do please add a link in the comments as I would love to see them.
Saturday, 18 February 2012
Yard Sale Heaven
Today Dave and I went to a vintage yard sale, house clearance which was an absolute Aladdin's cave of wonders.
A big thanks to the lovely Rachael who set up Made In Newcastle for inviting us to such a fab sale. We arrived to find two rooms packed full of awesome vintage finds. 20 years worth of charity shop hunts has done her proud. No surprise then that at 10.30 this morning, 1/2 hour before the sale opening a queue of people had formed outside to grab a bargain... and i mean a bargain.
Now i'm sorry if this makes you jealous but along with a vast amount of ace vintage fabric purchased for a mere £1, I also acquired this beautiful set of Studio Meakin crockery for, wait for it................£3!!! WOOO HOOO! I think you can tell i'm a little bit pleased :D
Friday, 17 February 2012
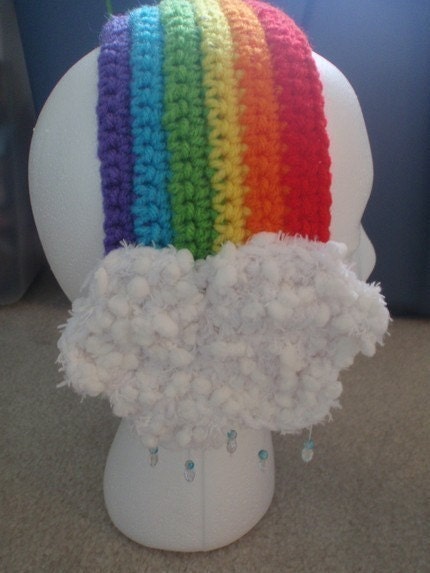
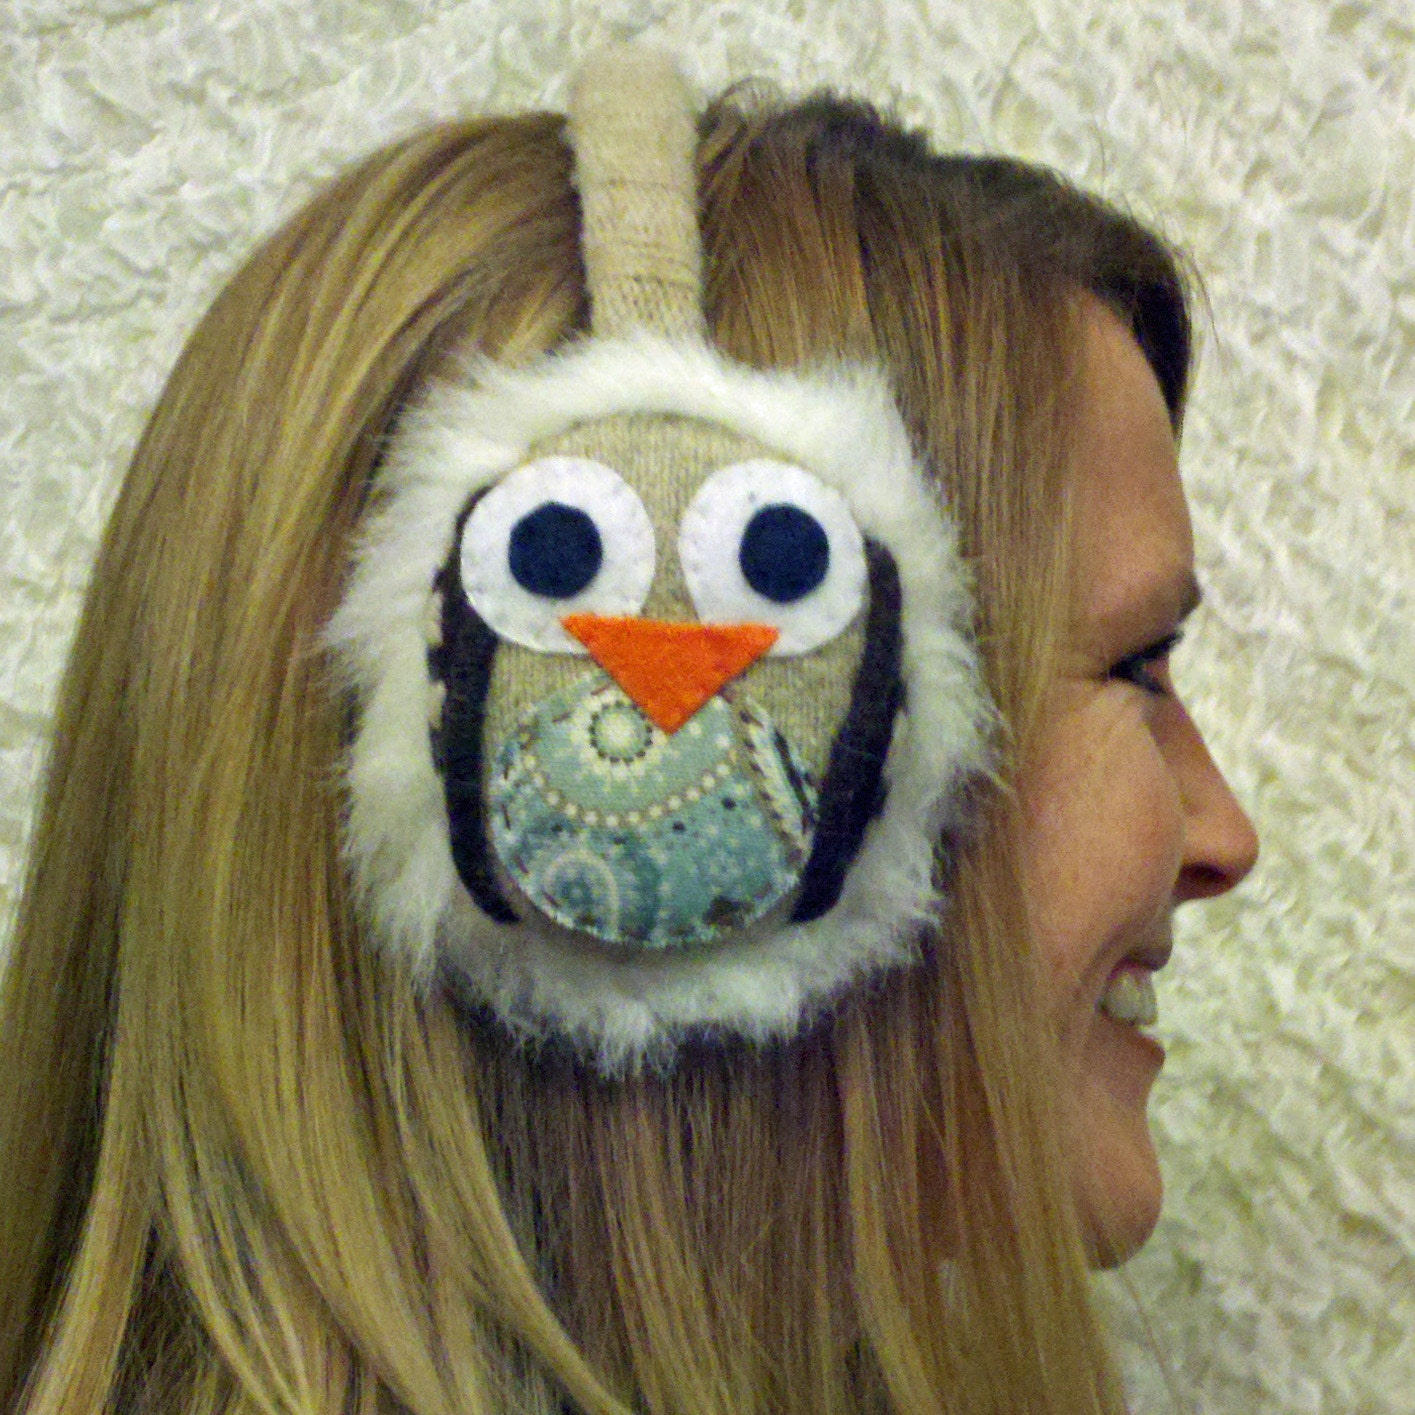
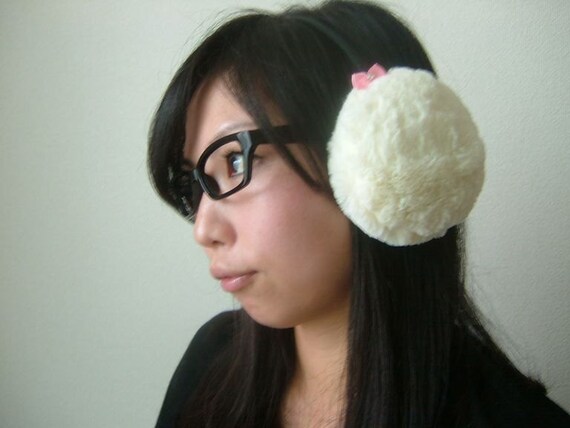
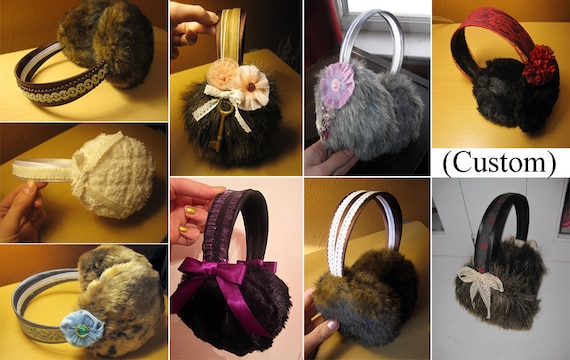
A collection of ear muffs
On an icy cold walk to work yesterday morning my ears burned as the chilly air whipped round them. Damn! I’d neglected to wear my much loved ear flap hat purchased from my favourite knitter Brigid Campbell of Irish Granny Originals. On passing the bus stop I jealously spotted a wise girl sporting a pair of ear muffs. When was the last time you wore a pair of these? I think I had some red furry ones when I was about 15.
Upon reaching the office I was given the disappointing news by a workmate that there have been blizzards forecast for the weekend. Definitely an occasion for ear muff wearing if ever there was one, so here is a collection of my favourite gathered from Etsy and Folksy. Admittedly most are from Etsy as Folksy have a serious ear muff deficiency. Oh and I warn you there are bad puns incoming!!
Adorable teddy ear warmers. Not quite a muff, but close enough!
Monday, 13 February 2012
Whatever happened to Made In Newcastle?
Many moons ago I blogged about the beginning of my involvement in Made In Newcastle or MiN for short, an empty shop project come artist/maker collective which began back in the summer of 2010.
For ages i’ve not really posted anything much about this collective as other things always seem to get in the way, but now seemed like a good time to do a little update about what has been happening. Many people must think its disappeared off the face of the planet. Well it hasn’t and the group, or whats left of us are still very much alive & kicking and in the process of restructuring the way the project works.
In May 2011 our second empty shop finished its temporary occupation of 79 Grainger Street in Newcastle City Centre. For a fair while the group was quite disparate and many of the original members have now left to do other things (such as little things like having children), but there are still a hard core of us left and what we’re working towards could be very exciting indeed.
Unfortunately and I don’t mean to be all 'Secret Squirrel' about it, but I can’t say that much at the moment because nothing is set. However we are at the moment on the look out for a permanent home which we call can our own for more than just 6 months.
If all works out and our master plan goes ahead then MiN will no longer be an empty shop project but hopefully a more permanent fixture on the Newcastle high street.
If you fancy finding out more about the collective and what we do/have done check out the website and blog. Oh and what self-respecting collective wouldn’t have a Facebook page too.
Long live MiN!!

MiN 2 at Grainger St premises.

The original gang outside MiN 1 on Nun Street.
For ages i’ve not really posted anything much about this collective as other things always seem to get in the way, but now seemed like a good time to do a little update about what has been happening. Many people must think its disappeared off the face of the planet. Well it hasn’t and the group, or whats left of us are still very much alive & kicking and in the process of restructuring the way the project works.
In May 2011 our second empty shop finished its temporary occupation of 79 Grainger Street in Newcastle City Centre. For a fair while the group was quite disparate and many of the original members have now left to do other things (such as little things like having children), but there are still a hard core of us left and what we’re working towards could be very exciting indeed.
Unfortunately and I don’t mean to be all 'Secret Squirrel' about it, but I can’t say that much at the moment because nothing is set. However we are at the moment on the look out for a permanent home which we call can our own for more than just 6 months.
If all works out and our master plan goes ahead then MiN will no longer be an empty shop project but hopefully a more permanent fixture on the Newcastle high street.
If you fancy finding out more about the collective and what we do/have done check out the website and blog. Oh and what self-respecting collective wouldn’t have a Facebook page too.
Long live MiN!!

MiN 2 at Grainger St premises.

The original gang outside MiN 1 on Nun Street.
Thursday, 9 February 2012
A Folksy Treasury
As I haven't yet got back to doing Folksy Friday posts as time keeps getting in the way or more appropriately lack of time, I decided instead to create a Folksy treasury. Essentially its the same as a Folksy Friday blog post but with much less text and more lovely pictures, which is the important bit anyway.
Here are my picks. Can you guess what the treasury theme is?
I'm sure you've guessed it although perhaps the swan put a spanner in the works, but doesn't it remind you of a beautiful ice sculpture?
Yup 'Ice' is the treasury theme in homage to the slipping and sliding into work yesterday morning on treacherous sheet black ice. I only just managed to stay upright.
Hope you enjoyed the ice inspired selection. Time to warm myself up with a hot cuppa me thinks. Have a good weekend!
Here are my picks. Can you guess what the treasury theme is?
Yup 'Ice' is the treasury theme in homage to the slipping and sliding into work yesterday morning on treacherous sheet black ice. I only just managed to stay upright.
Hope you enjoyed the ice inspired selection. Time to warm myself up with a hot cuppa me thinks. Have a good weekend!
Friday, 3 February 2012
Spread your wings and fly
No ladies this isn't about sanitary towels ha ha :) Sorry! Crap joke over.
Okay in my last post I warned that I was going to milk my new illustration 'In Flight' as much as possible given the sheer amount of time and graft its taken. I want to use this extended blog post to show you how the image was created and share some more detailed pics of the illustration. I promise once this is out of my system I won't bore you to death and go on about it anymore ; )
The image was inspired by watching a nature documentary some time ago which explained how birds of prey navigate through the trees and the fly through dense forest. As you can imagine it was pretty impressive. I began by sketching the image out in pencil on A4 paper.

Once the pencil drawing was complete I hand traced owly in black fine liner and scanned this into the computer. The girl was left out at this stage as the original drawing of her was quite small so it didn't allow me to add much detail. Instead I opted to blow up the sketch of the girl on the Mac, print it out and work on this larger image. It could then shrunk back down later. After scanning the owl tracing the arduous task of refining the black outline began. This took around 6 hours - ouch >__< Once i was happy with the drawing of the girl, she was also traced in fine liner, scanned onto the computer and the outline refined. Then she was shrunk to her original diminutive size. Ta da! The completed outline:

At this point i managed to deceive myself into thinking that the main bulk of the work was done. Then realised adding the detail in the wings would be a MAMMOTH task. After experimenting it seemed the best way forward was to create a single detailed feather which I could copy, paste and manipulate to fit into each wing feather. The result was this:

Next was owly's body. An altogether different kettle of fish as i soon found the previous method used for the wings could not be applied to the body. Starting with the head first I copy pasted a less detailed feather tip in a circular pattern from the face outwards and used a similar process for the chest and legs but with the feathers more spaced out. The result wasn't that convincing as i didn't feel there was enough detail in the body and head compared to the wings making the style look inconsistent. So i tried applying a pre-made, fur-like texture (created for the Autumn Rain illustration) under the feather pattern. Thankfully it worked. Don't know what I would have done otherwise - cried probably. After adding colour the owl was finally done.

The girl was a LOT more straightforward. I added the colour, then some pattern/texture was pasted into her coat and tights - nice and quick. This was the complete foreground image:

Now all that was needed was a background. I suppose this should have been something I'd thought about when working on the sketch, but hey that would have been too easy. The composition of the owl & girl is arranged as if the viewer is looking up at them from below. This meant whatever was in the background had to be something that would be positioned above the characters ruling out anything on a ground level. Sky was an obvious choice but this would be quite plain on its own. After a brainstorming session mountains seemed the perfect fit.
Eh voila 'In Flight' was complete almost three weeks from when I'd started it - YIKES!!
Quite honestly a ridiculous amount of time to spend on an image. I swear it doesn't normally take me this long to finish a piece.
The illustration is now available on Etsy as an A4 size or larger A3 size glossy print.

Okay in my last post I warned that I was going to milk my new illustration 'In Flight' as much as possible given the sheer amount of time and graft its taken. I want to use this extended blog post to show you how the image was created and share some more detailed pics of the illustration. I promise once this is out of my system I won't bore you to death and go on about it anymore ; )
The image was inspired by watching a nature documentary some time ago which explained how birds of prey navigate through the trees and the fly through dense forest. As you can imagine it was pretty impressive. I began by sketching the image out in pencil on A4 paper.

Once the pencil drawing was complete I hand traced owly in black fine liner and scanned this into the computer. The girl was left out at this stage as the original drawing of her was quite small so it didn't allow me to add much detail. Instead I opted to blow up the sketch of the girl on the Mac, print it out and work on this larger image. It could then shrunk back down later. After scanning the owl tracing the arduous task of refining the black outline began. This took around 6 hours - ouch >__< Once i was happy with the drawing of the girl, she was also traced in fine liner, scanned onto the computer and the outline refined. Then she was shrunk to her original diminutive size. Ta da! The completed outline:

At this point i managed to deceive myself into thinking that the main bulk of the work was done. Then realised adding the detail in the wings would be a MAMMOTH task. After experimenting it seemed the best way forward was to create a single detailed feather which I could copy, paste and manipulate to fit into each wing feather. The result was this:

Next was owly's body. An altogether different kettle of fish as i soon found the previous method used for the wings could not be applied to the body. Starting with the head first I copy pasted a less detailed feather tip in a circular pattern from the face outwards and used a similar process for the chest and legs but with the feathers more spaced out. The result wasn't that convincing as i didn't feel there was enough detail in the body and head compared to the wings making the style look inconsistent. So i tried applying a pre-made, fur-like texture (created for the Autumn Rain illustration) under the feather pattern. Thankfully it worked. Don't know what I would have done otherwise - cried probably. After adding colour the owl was finally done.

The girl was a LOT more straightforward. I added the colour, then some pattern/texture was pasted into her coat and tights - nice and quick. This was the complete foreground image:

Now all that was needed was a background. I suppose this should have been something I'd thought about when working on the sketch, but hey that would have been too easy. The composition of the owl & girl is arranged as if the viewer is looking up at them from below. This meant whatever was in the background had to be something that would be positioned above the characters ruling out anything on a ground level. Sky was an obvious choice but this would be quite plain on its own. After a brainstorming session mountains seemed the perfect fit.
Eh voila 'In Flight' was complete almost three weeks from when I'd started it - YIKES!!
Quite honestly a ridiculous amount of time to spend on an image. I swear it doesn't normally take me this long to finish a piece.
The illustration is now available on Etsy as an A4 size or larger A3 size glossy print.

Subscribe to:
Comments (Atom)


